
The 30 Circles Exercise
Helping students learn to come up with ideas quickly

(Note: I’ve decided to start using Substack as a way to draft ideas for blog posts before putting them up on Renovated Learning. So if you’re subscribing here, you might just get a sneak peek at what I’m working on before it goes up on the blog. I want to see if this might help me to get back into the writing groove again. I happily welcome any feedback)
30 Circles is an exercise that I’ve seen mentioned in quite a few books on Design Thinking and it’s one of my favorites to use when introducing students to design. (This book is the one I was reading when I decided to incorporate it into my classes). You can read more about the origins of the exercise over here on IDEO. In this post, I’m going to share how I’ve adapted the exercise to use with students in my middle school design thinking class.
Setup for 30 Circles
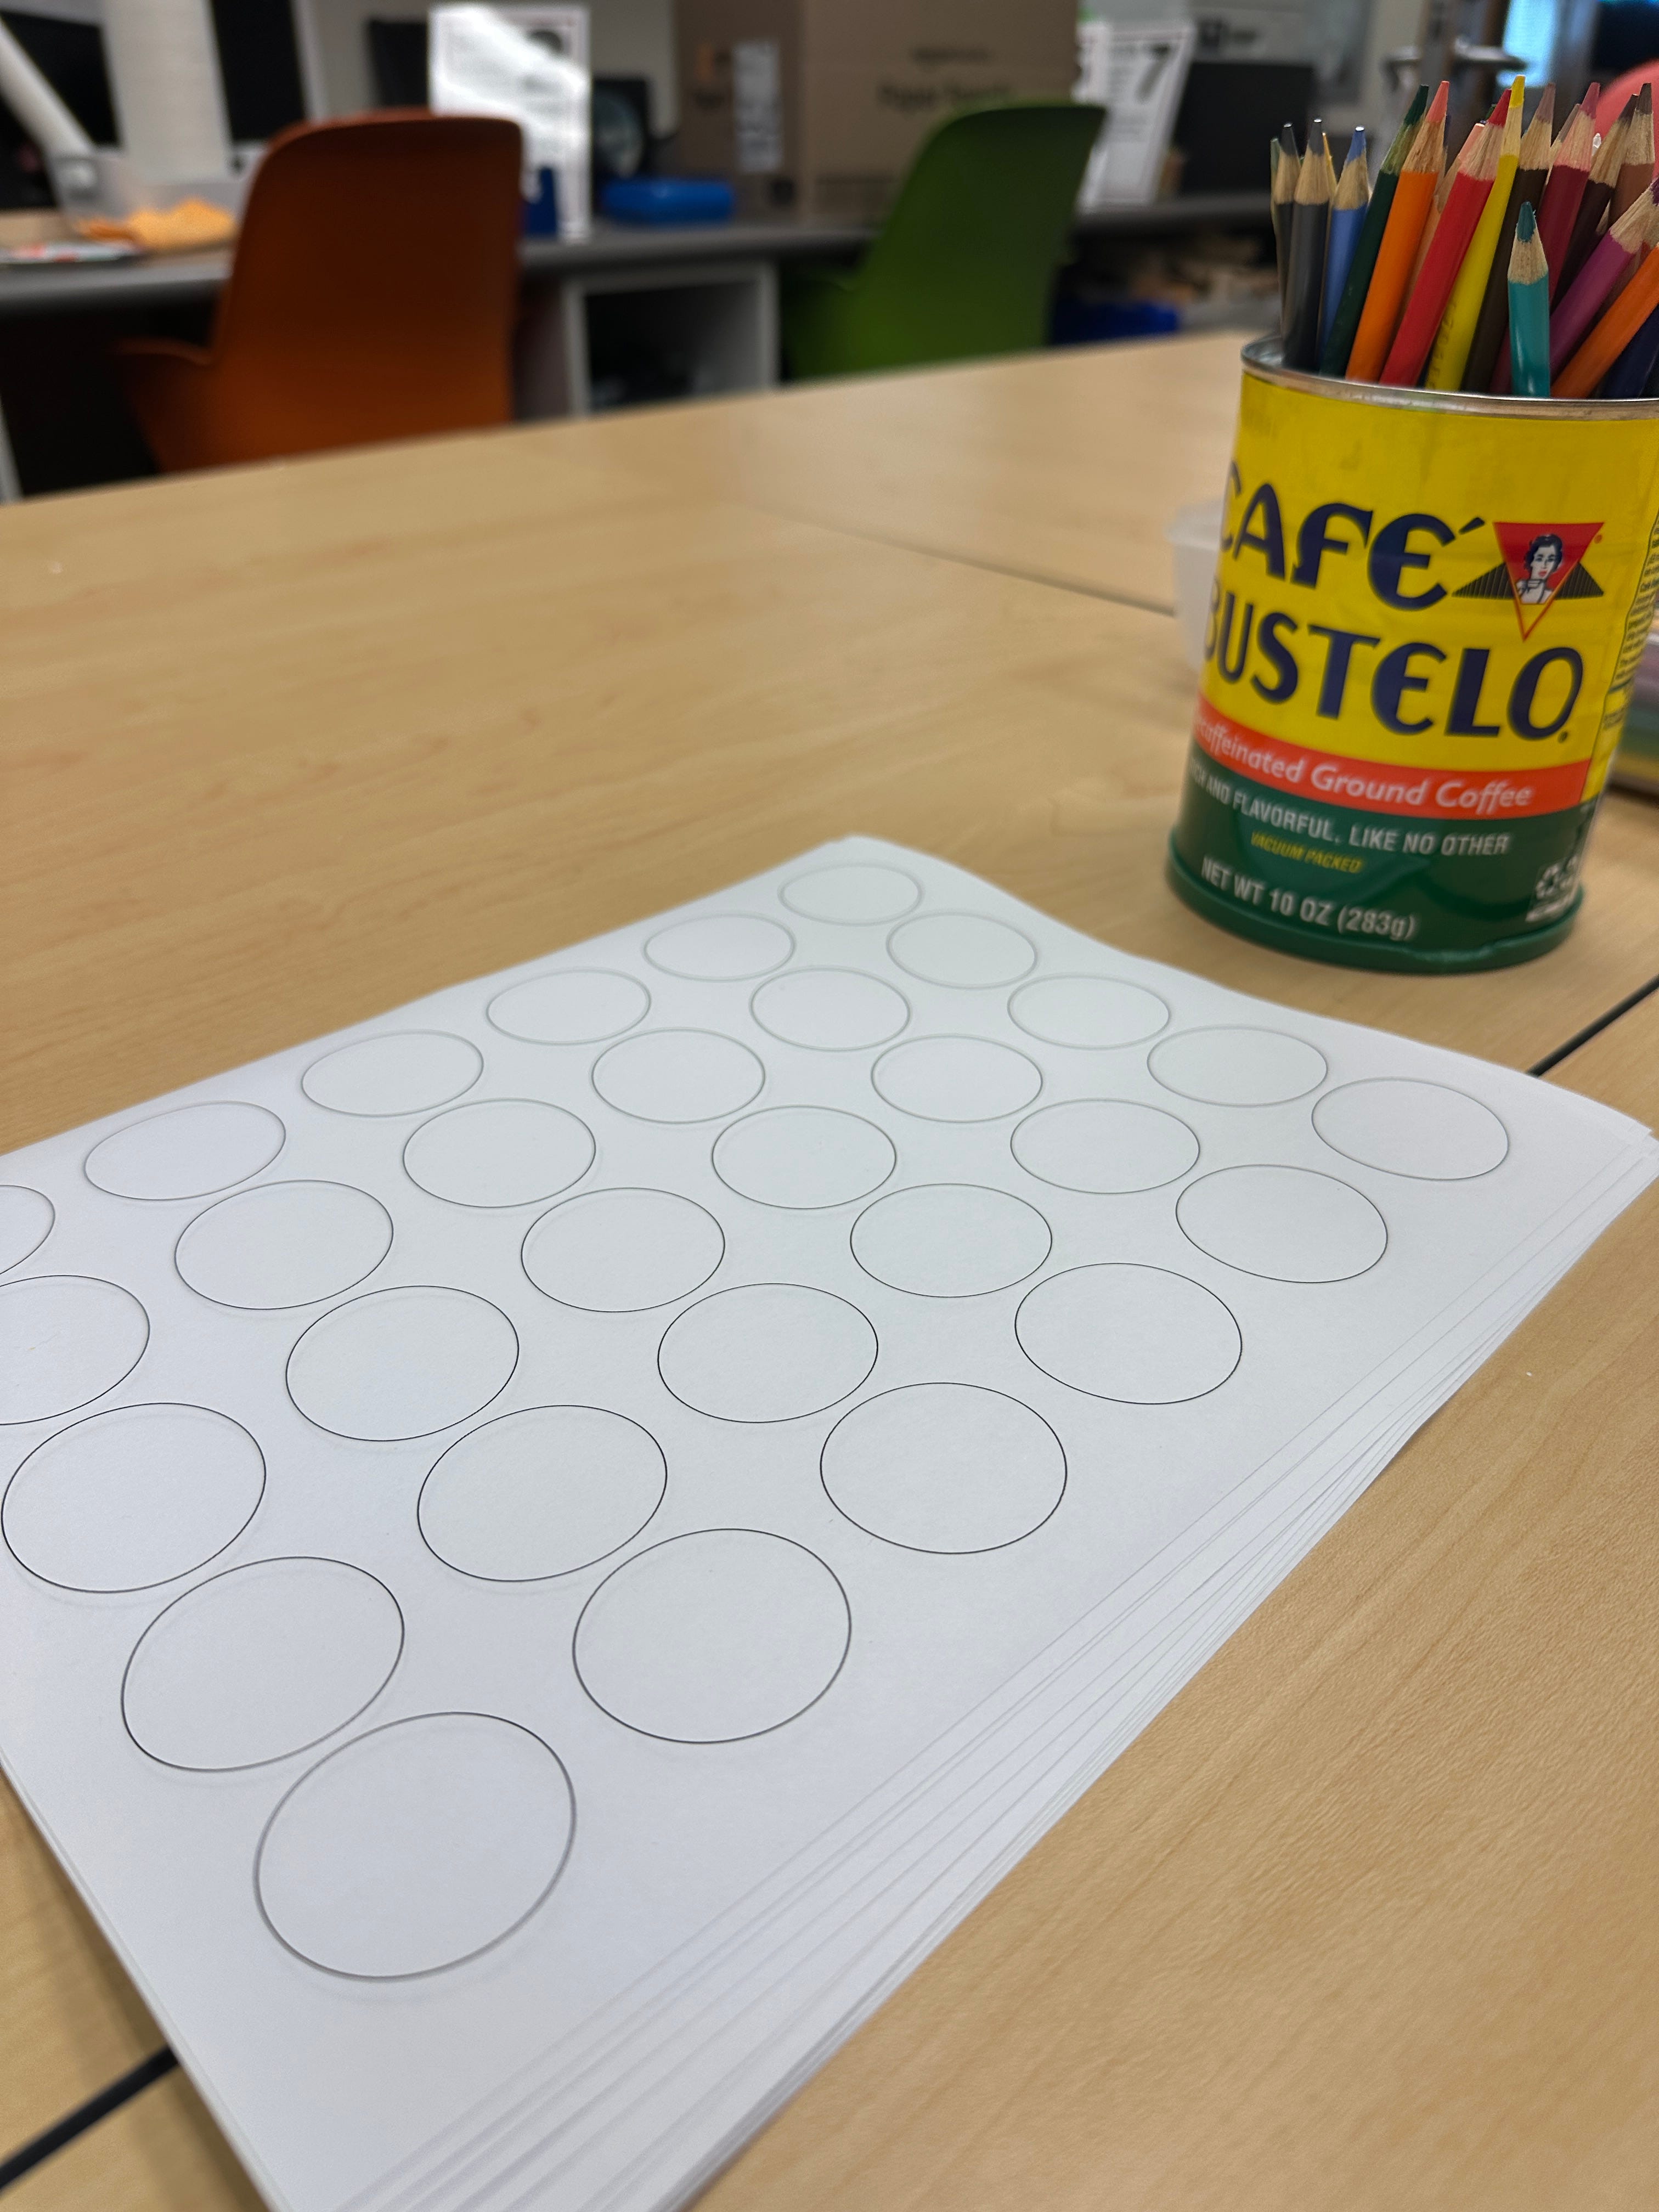
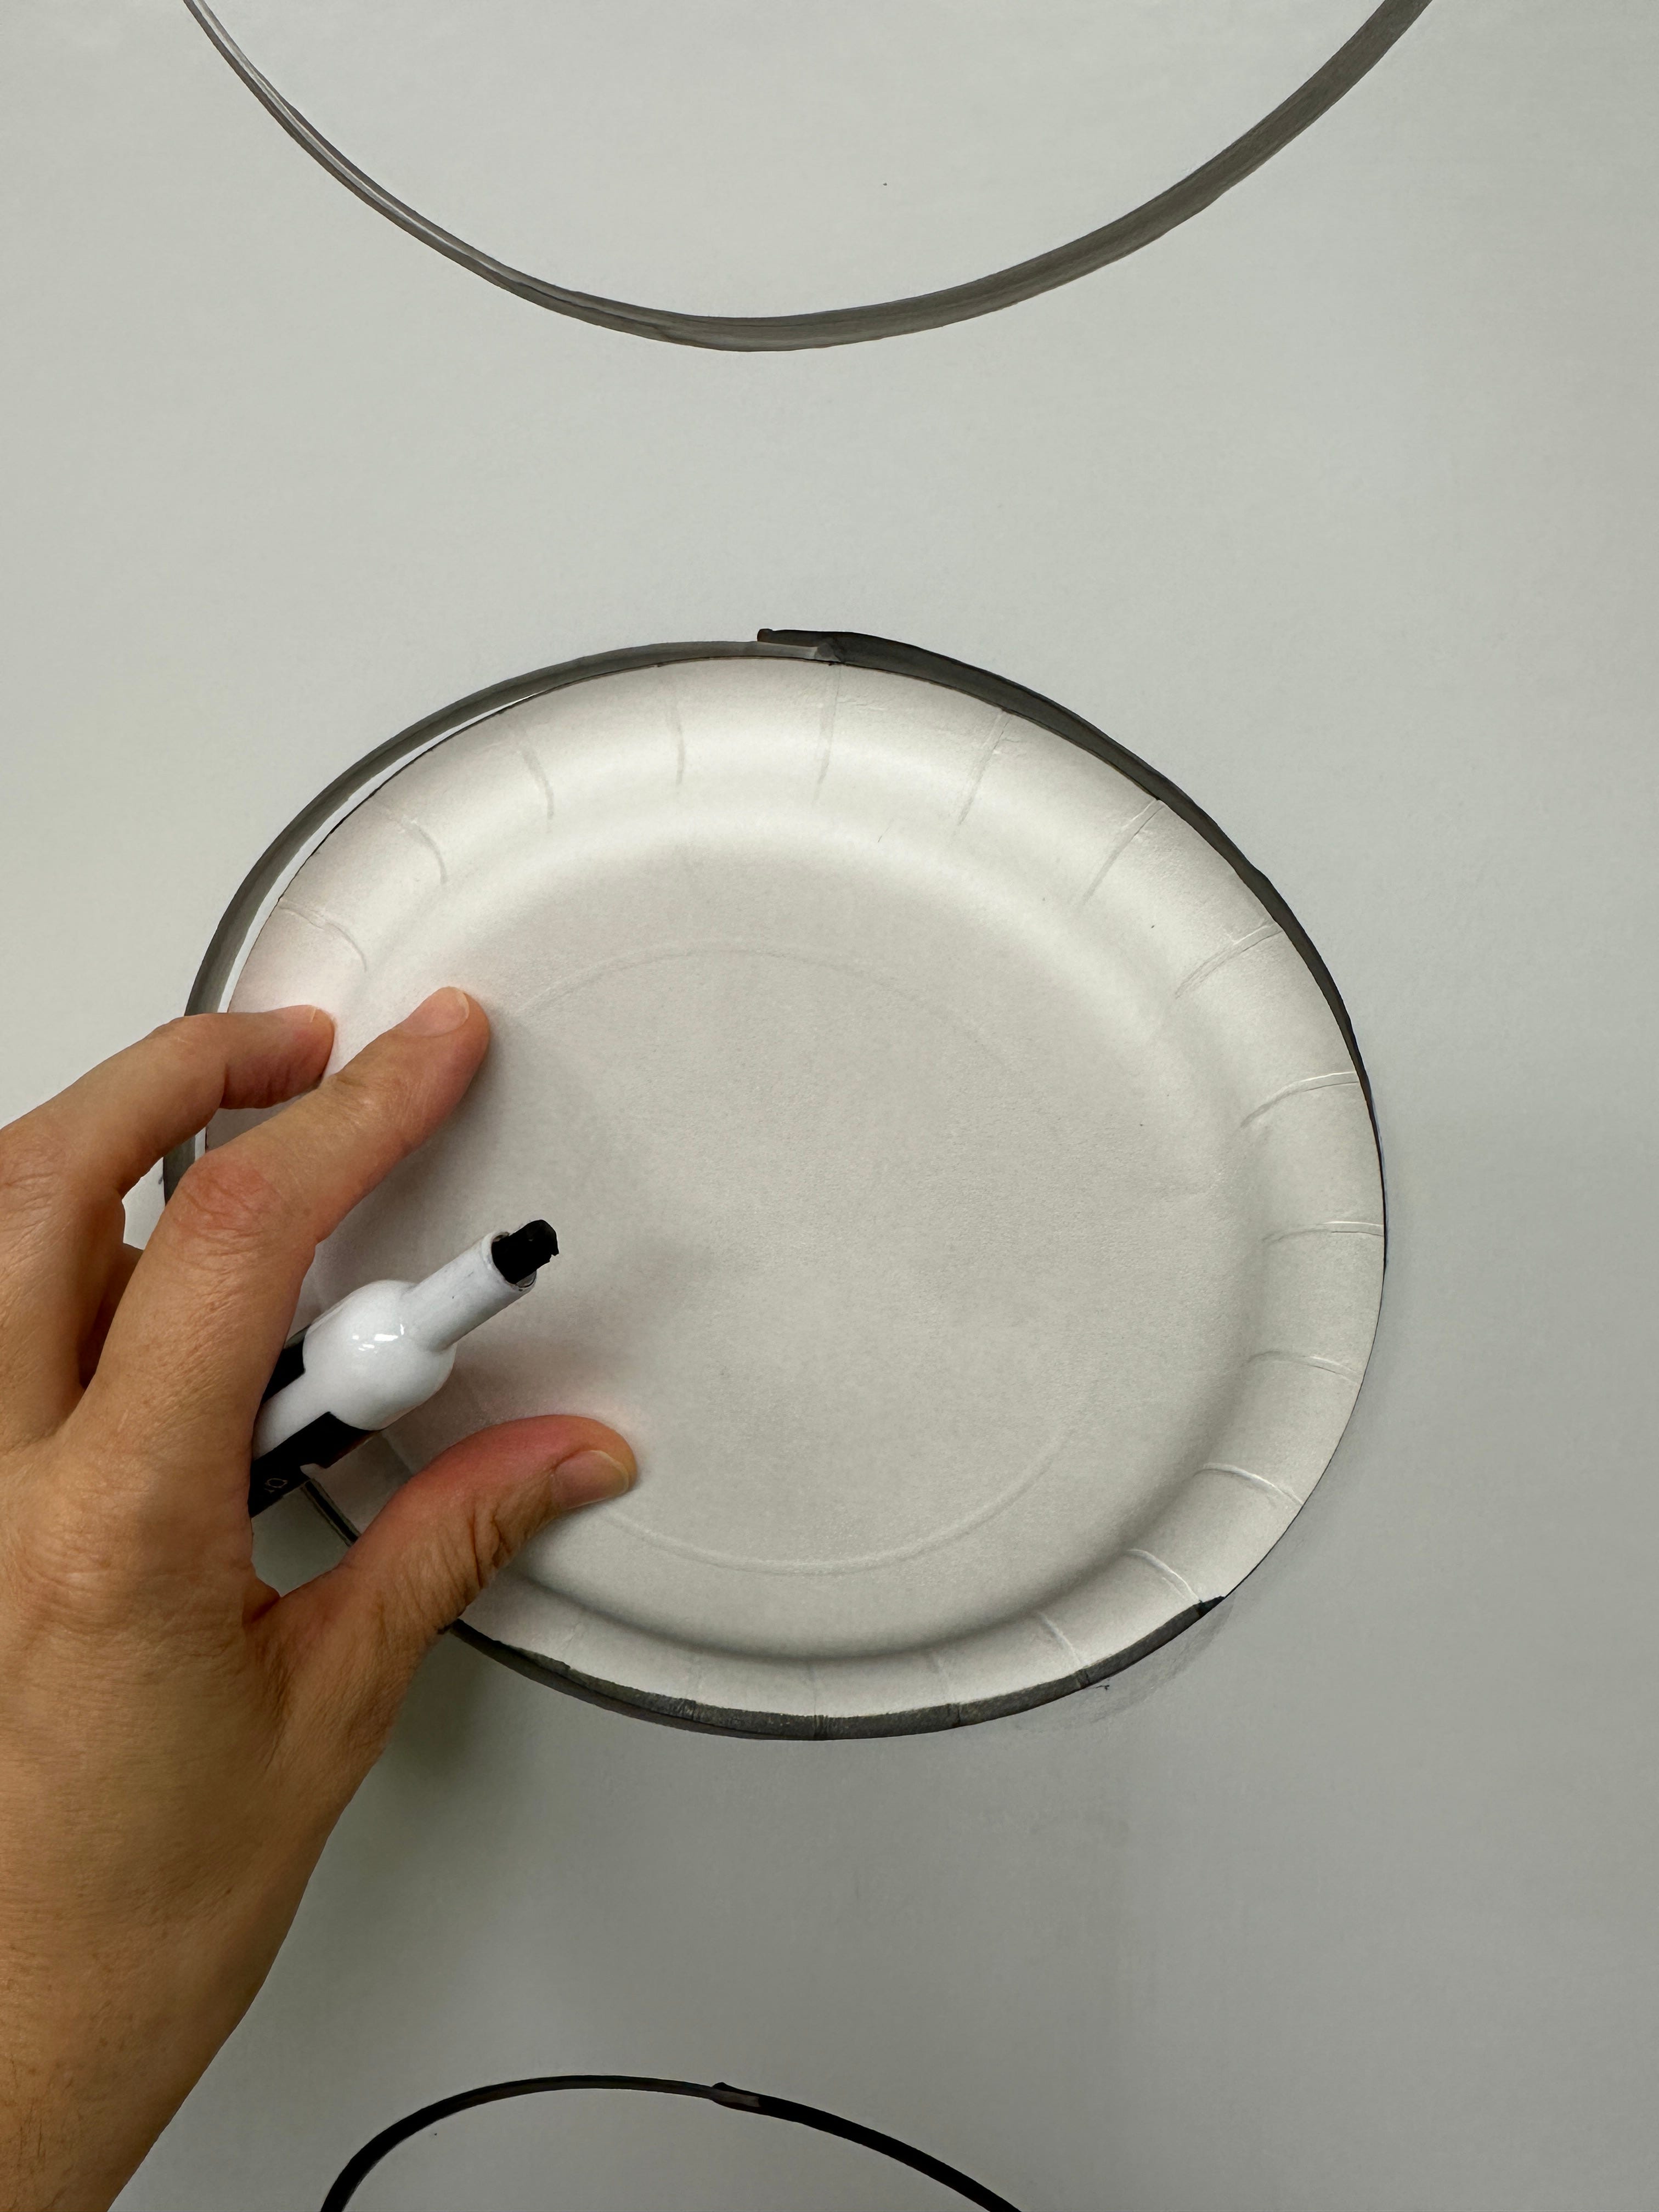
I start by giving each student a sheet with 30 circles on it (I just print out these templates, but you could also make them yourself on a design program like Canva or have students draw 30 circles). I have bins of colored pencils on the tables for them to use. Before class, I’ve also prepped my whiteboard with 30 circles - I used a paper plate to make them look a bit nicer.
Introducing the activity
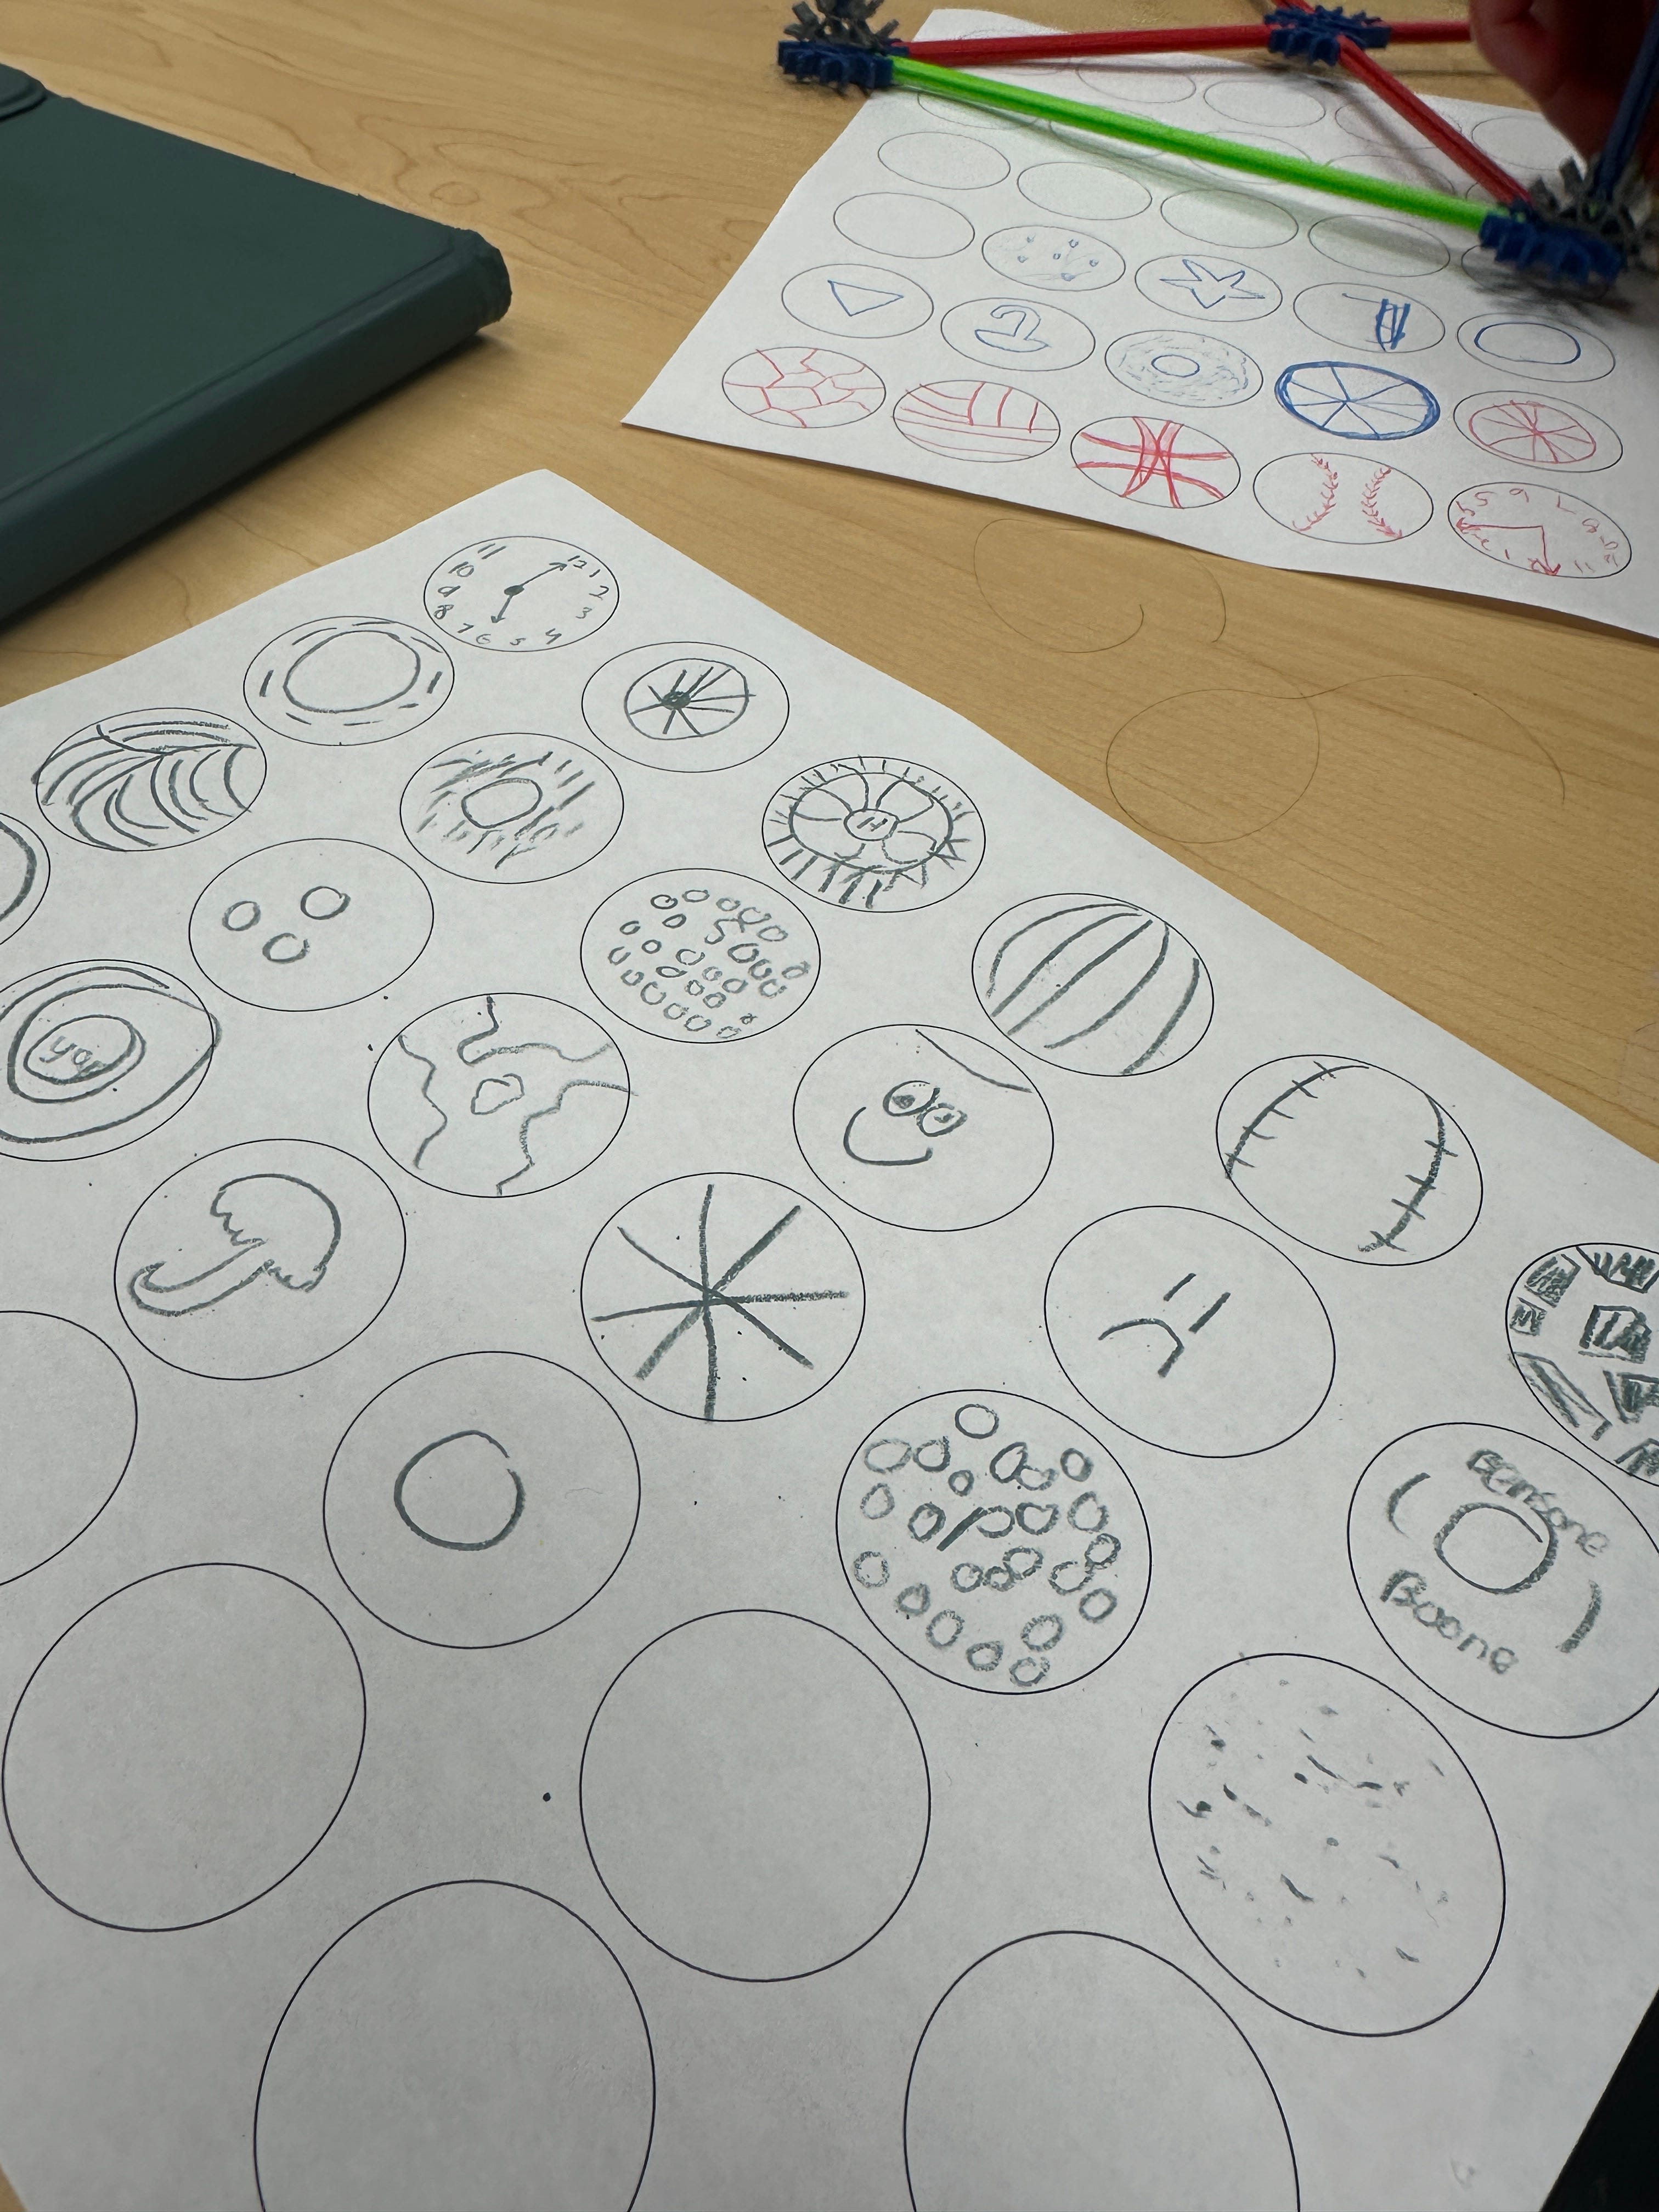
I tell students that their goal is to create as many objects as possible using the circles. I give a couple of examples (i.e. a clock, a cookie, a baseball) to get them started. Don’t give too many, or that might be all they do. I try not to add any more direction than that - I noticed students asking a LOT of extra specifics when I tried this last week, so I stuck with the “create objects using the circles” directions. Should I add more direction? Maybe. Some of my students stretch things a bit far (i.e. 30 different “flavors” of cookie to fill up all their circles). But in general, I prefer to err on the side of being more open-ended with design challenges in makerspaces.
They get 3 minutes. That time I’m pretty firm on. I want it to be long enough that they experience a point where they get stuck and short enough that they feel the pressure to keep going.
Reflect, then whiteboard
After pencils go down, we reflect for a bit. Who got at least five circles filled? Ten? Fifteen? Twenty? More? It’s pretty rare that all 30 circles get filled. We then talk about the activity some more. What did it feel like to get stuck? How did you get unstuck? Was it frustrating?
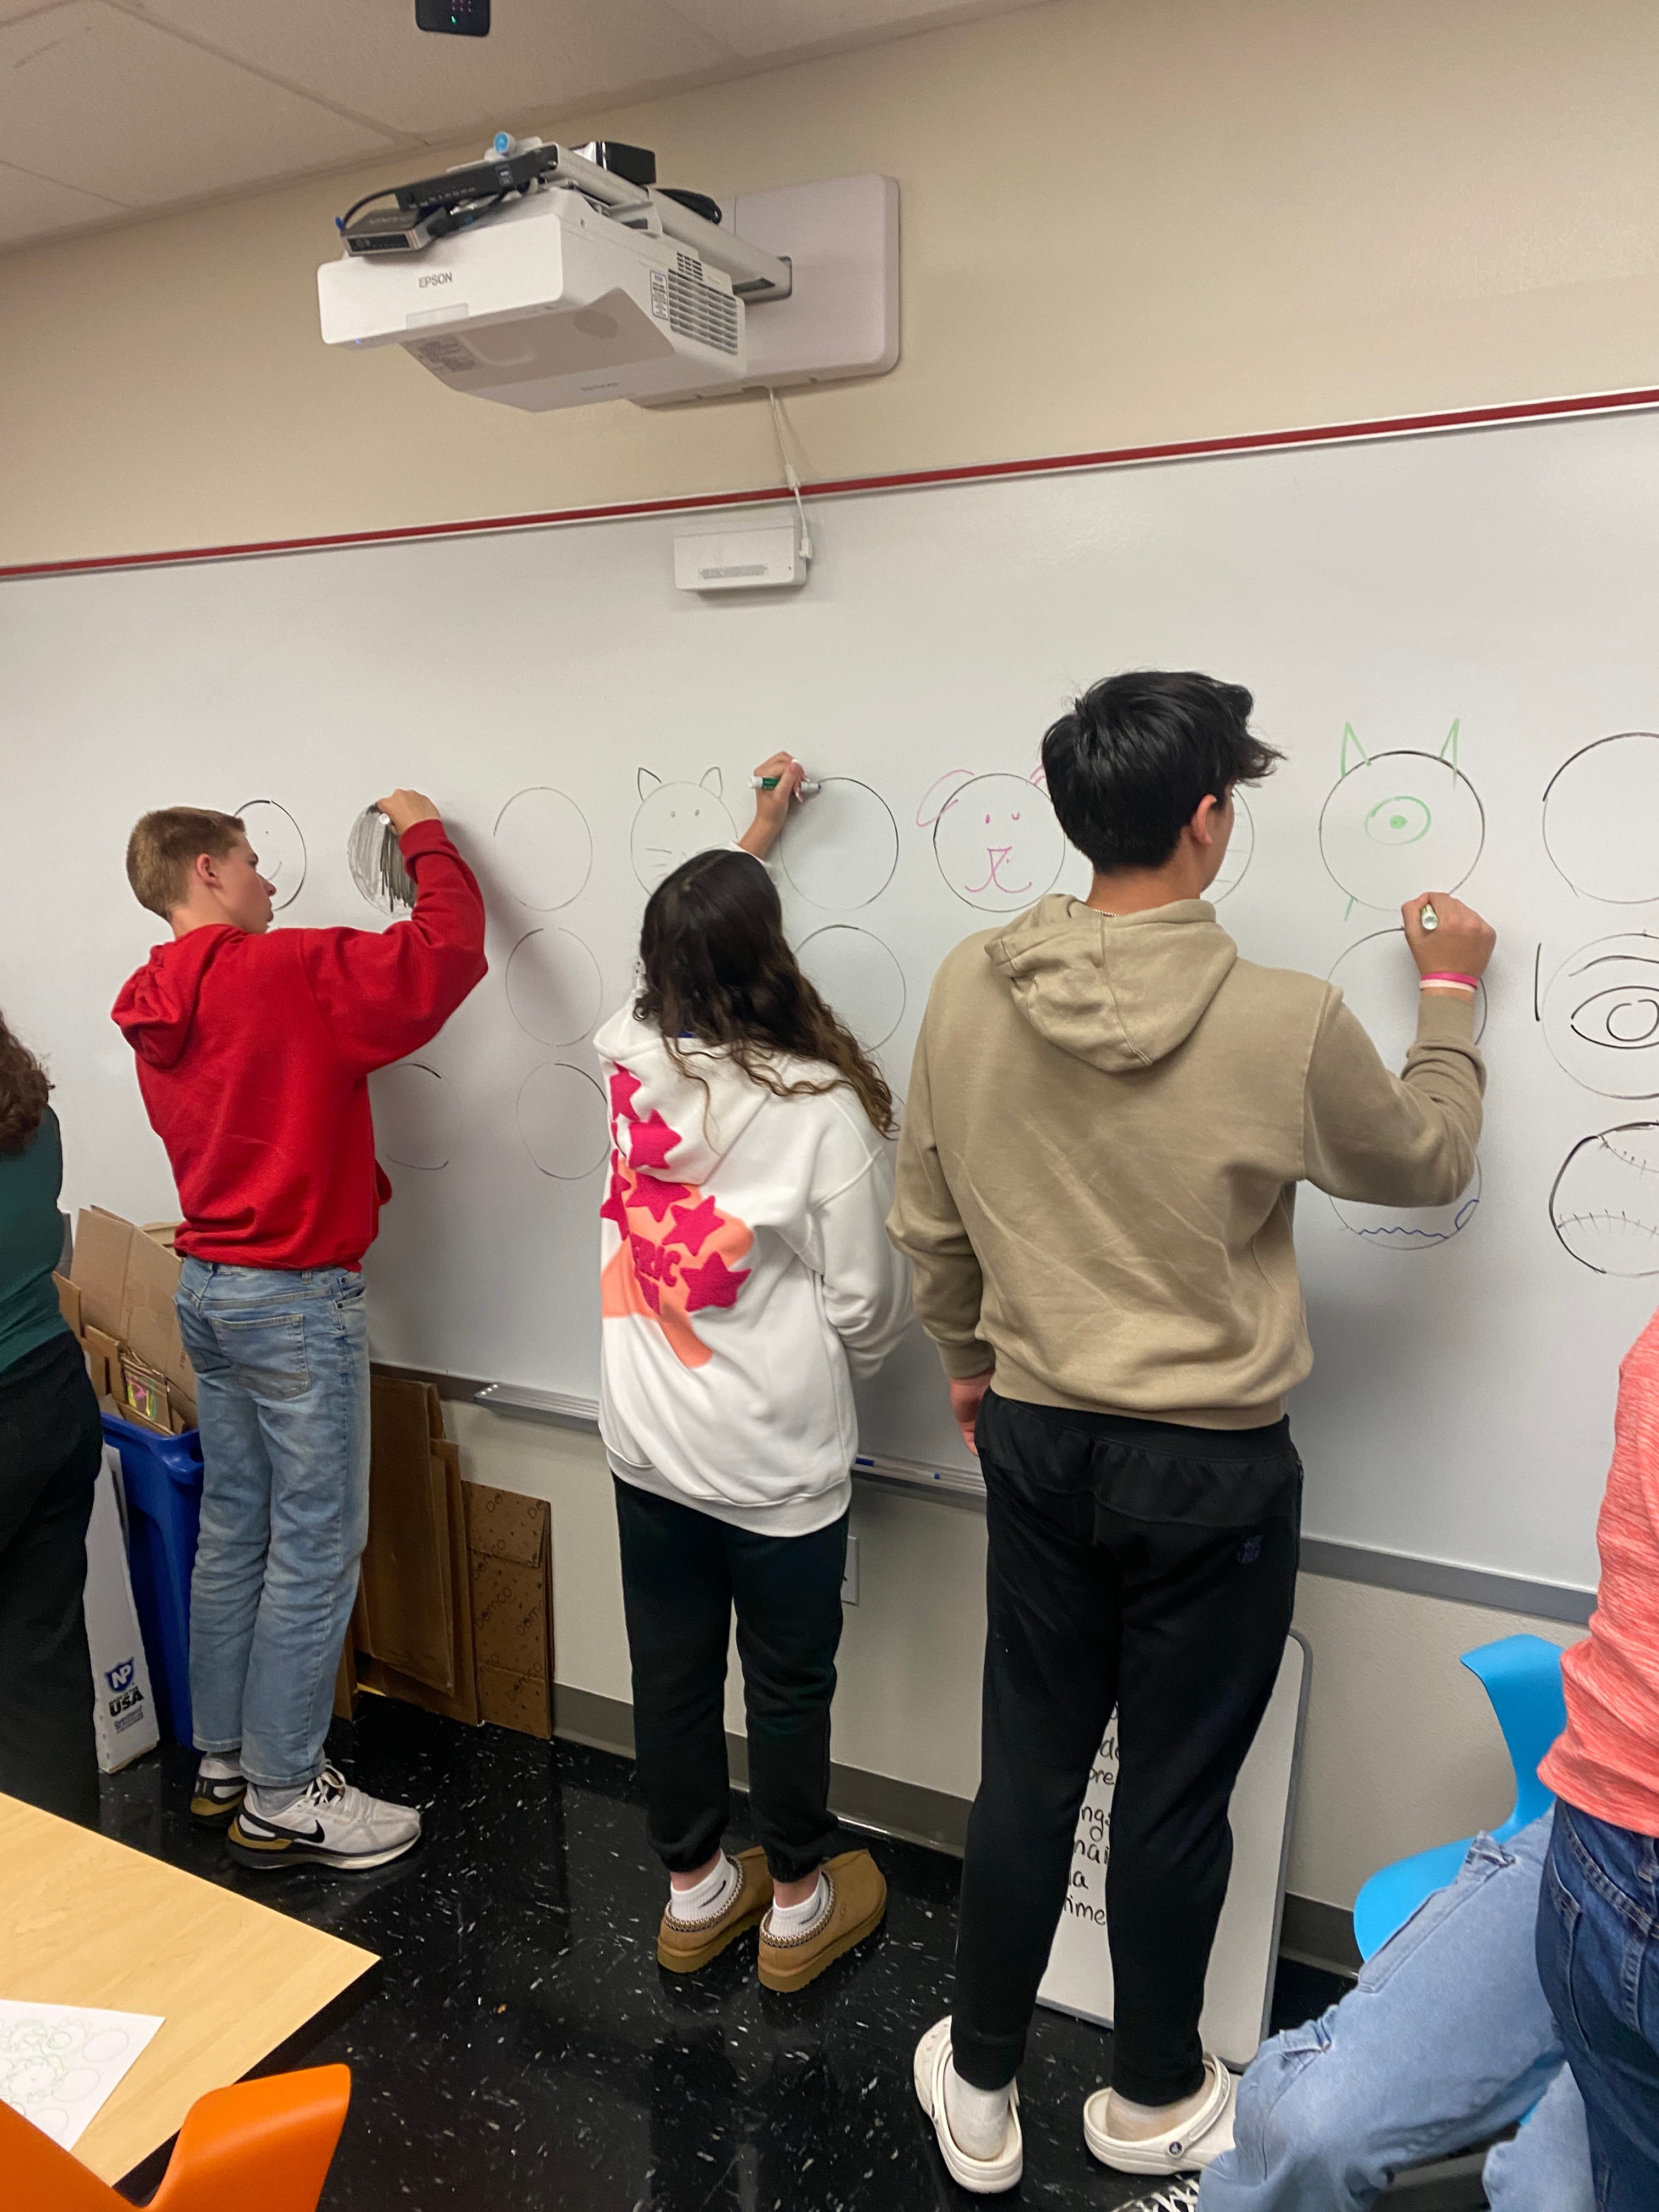
Then we transition to the whiteboard of 30 circles. If the class is small (and okay with loose structure) I have all the students go up at once. If it’s a larger class or they’re pretty rambunctious, we line up and go to the board one at a time. The only rule here is that they can’t repeat something someone else has drawn. But they can help each other, look to their sheets for ideas, and get inspiration from what someone else drew. We do this until all 30 circles are filled.
Final reflection
Here, we settle back in and have another discussion.
Was it easier to think of things to put in the circles when you worked together?
Did you notice themes or derivatives (i.e. baseball, basketball, golf ball, volley ball)?
Did anyone think outside the circle (i.e. Connecting two circles to make eyeglasses. Adding things to the outside of the circle like cat ears)?
My goal is for them is twofold:
One: I want my students to see the benefit of rapidly coming up with lots of ideas
Two: I want them to see the power of collaboration and working together to solve a problem
I used this activity with my 7th and 8th grade Design Thinking elective, but it could also work great for a library makerspace collaboration, a Makers Club or in other contexts.
Have you ever tried the 30 circles exercise or something similar with your students? How did you adapt or change the exercise?